私人訊息 - 第四部分
本指南分為四個不同的部分
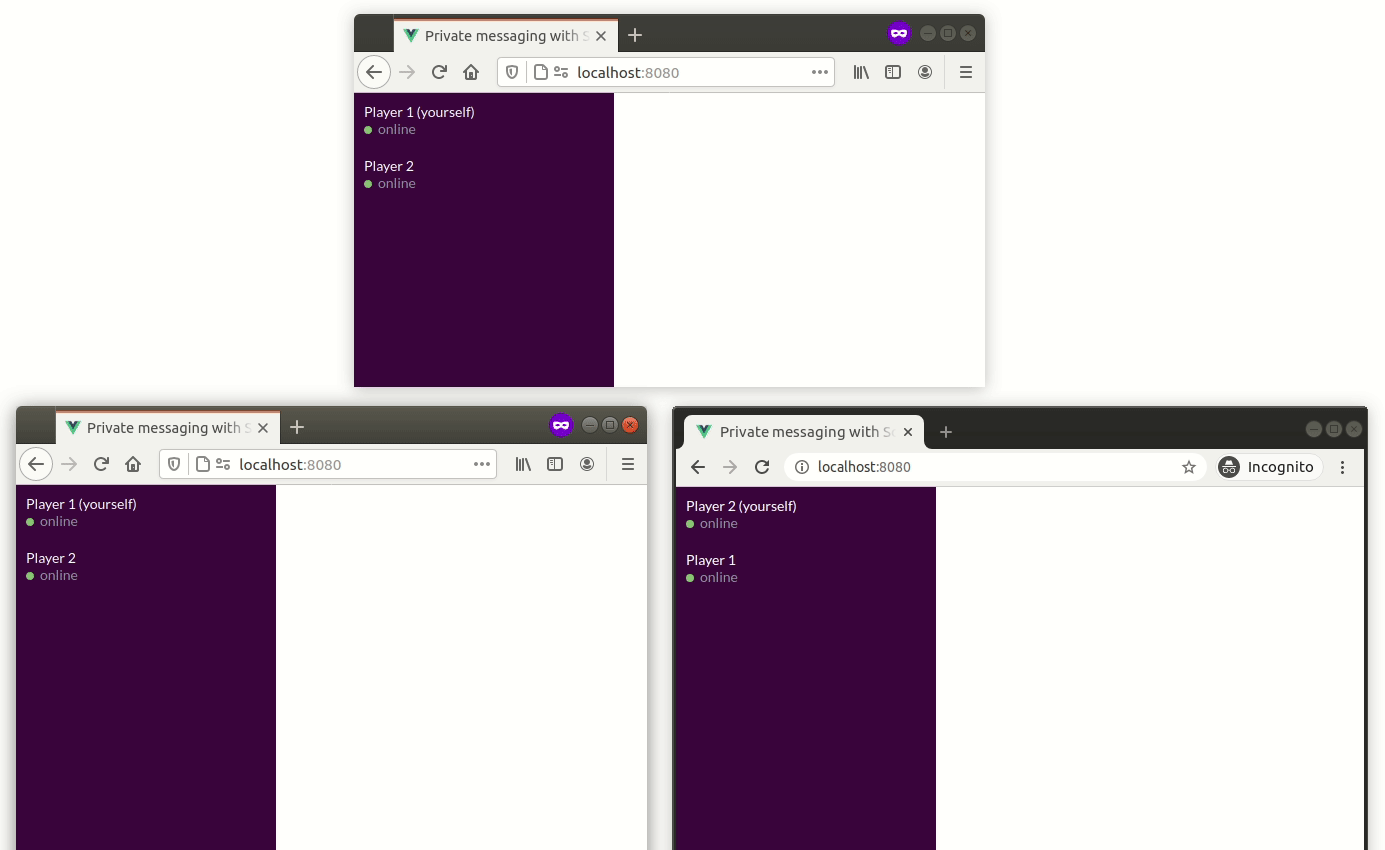
以下是我們在第三部分結束時的狀況
現在我們將了解如何擴充到多個 Socket.IO 伺服器,以達到高可用性/負載平衡的目的。
安裝
讓我們查看第四部分的分支
git checkout examples/private-messaging-part-4
以下是您應該在目前目錄中看到的內容
├── babel.config.js
├── package.json
├── public
│   ├── favicon.ico
│   ├── fonts
│   │   └── Lato-Regular.ttf
│   └── index.html
├── README.md
├── server
│   ├── cluster.js (created)
│   ├── docker-compose.yml (created)
│   ├── index.js (updated)
│   ├── messageStore.js (updated)
│   ├── package.json (updated)
│   └── sessionStore.js (updated)
└── src
    ├── App.vue
    ├── components
    │   ├── Chat.vue
    │   ├── MessagePanel.vue
    │   ├── SelectUsername.vue
    │   ├── StatusIcon.vue
    │   └── User.vue
    ├── main.js
    └── socket.js
完整的 diff 可在此找到。
更新伺服器
對於最後一部分,我們需要在伺服器端新增 3 個依賴項
ioredis:一個很棒的 Redis 用戶端socket.io-redis:一個基於 Redis 發布/訂閱機制的 Socket.IO 轉接器@socket.io/sticky:一個在 Node.js 叢集中執行 Socket.IO 的模組
我們也需要一個 Redis 實例。為了您的方便,提供了一個 docker-compose.yml 檔案
cd server
docker-compose up -d

npm install
npm start
這將建立 4 個 Node.js 工作人員,每個工作人員執行相同的 index.js 檔案。
在客戶端方面,不需要任何變更,我們將在此專注於伺服器端。
運作方式
建立多個伺服器
在建立多個 Socket.IO 伺服器時,有兩件事要做
- 您需要啟用 sticky-session(請參閱 這裡 以取得完整說明)
- 您需要將預設的記憶體中介接頭替換為 Redis 中介接頭(或其他相容的中介接頭)
在我們的範例中,@socket.io/sticky 模組用於確保來自特定客戶端的請求始終路由到同一個 Socket.IO 伺服器。這就是所謂的「sticky-session」

注意:我們也可以建立多個監聽不同埠的程序(或使用多個主機),並在它們前面新增一個反向代理程式。在 文件 中涵蓋了為常見的反向代理程式解決方案(例如 NginX 或 HAProxy)啟用 sticky-session。
叢集建立在 server/cluster.js 檔案中
const cluster = require("cluster");
const http = require("http");
const { setupMaster } = require("@socket.io/sticky");

const WORKERS_COUNT = 4;

if (cluster.isMaster) {
  console.log(`Master ${process.pid} is running`);

  for (let i = 0; i < WORKERS_COUNT; i++) {
    cluster.fork();
  }

  cluster.on("exit", (worker) => {
    console.log(`Worker ${worker.process.pid} died`);
    cluster.fork();
  });

  const httpServer = http.createServer();
  setupMaster(httpServer, {
    loadBalancingMethod: "least-connection", // either "random", "round-robin" or "least-connection"
  });
  const PORT = process.env.PORT || 3000;

  httpServer.listen(PORT, () =>
    console.log(`server listening at https://#:${PORT}`)
  );
} else {
  console.log(`Worker ${process.pid} started`);
  require("./index");
}
在我們現有的 server/index.js 檔案中,有一個變更:工作人員程序建立的 HTTP 伺服器實際上不會監聽特定埠,請求將由主程序處理,然後轉發到正確的工作人員。
之前
httpServer.listen(PORT, () =>
  console.log(`server listening at https://#:${PORT}`)
);
之後
setupWorker(io);
@socket.io/sticky 提供的 setupWorker 方法將負責主程序和工作人員之間的同步。
階段和訊息
現在已啟用 sticky-session,我們需要在 Socket.IO 伺服器之間共用階段和訊息。
我們建立一個基於 Redis 的新 SessionStore。我們將每個階段儲存在 Redis hash 中,並使用 HSET 命令
class RedisSessionStore extends SessionStore {
  // ...
  saveSession(id, { userID, username, connected }) {
    this.redisClient
      .multi()
      .hset(`session:${id}`, "userID", userID, "username", username, "connected", connected)
      .expire(`session:${id}`, SESSION_TTL)
      .exec();
  }
  // ...
}
我們還設定金鑰的過期時間,以清除舊階段。
使用 HMGET 指令擷取階段非常簡單
const mapSession = ([userID, username, connected]) =>
  userID ? { userID, username, connected: connected === "true" } : undefined;

class RedisSessionStore extends SessionStore {
  // ...
  findSession(id) {
    return this.redisClient
      .hmget(`session:${id}`, "userID", "username", "connected")
      .then(mapSession);
  }
  // ...
}
擷取所有階段則稍微複雜一點
class RedisSessionStore extends SessionStore {
  // ...
  async findAllSessions() {
    // first, we fetch all the keys with the SCAN command
    const keys = new Set();
    let nextIndex = 0;
    do {
      const [nextIndexAsStr, results] = await this.redisClient.scan(
        nextIndex,
        "MATCH",
        "session:*",
        "COUNT",
        "100"
      );
      nextIndex = parseInt(nextIndexAsStr, 10);
      results.forEach((s) => keys.add(s));
    } while (nextIndex !== 0);

    // and then we retrieve the session details with multiple HMGET commands
    const commands = [];
    keys.forEach((key) => {
      commands.push(["hmget", key, "userID", "username", "connected"]);
    });
    return this.redisClient
      .multi(commands)
      .exec()
      .then((results) => {
        return results
          .map(([err, session]) => (err ? undefined : mapSession(session)))
          .filter((v) => !!v);
      });
  }
}
類似地,我們根據 Redis 建立新的 MessageStore。我們會將所有連結到特定使用者的訊息儲存在 Redis 清單中,使用 RPUSH 指令
class RedisMessageStore extends MessageStore {
  // ...
  saveMessage(message) {
    const value = JSON.stringify(message);
    this.redisClient
      .multi()
      .rpush(`messages:${message.from}`, value)
      .rpush(`messages:${message.to}`, value)
      .expire(`messages:${message.from}`, CONVERSATION_TTL)
      .expire(`messages:${message.to}`, CONVERSATION_TTL)
      .exec();
  }
  // ...
}
使用 LRANGE 指令擷取訊息
class RedisMessageStore extends MessageStore {
  // ...
  findMessagesForUser(userID) {
    return this.redisClient
      .lrange(`messages:${userID}`, 0, -1)
      .then((results) => {
        return results.map((result) => JSON.parse(result));
      });
  }
}
轉發訊息
需要進行最後一項修改:我們需要確保訊息確實傳送給收件者,即使此收件者未連線到相同的 Socket.IO 伺服器
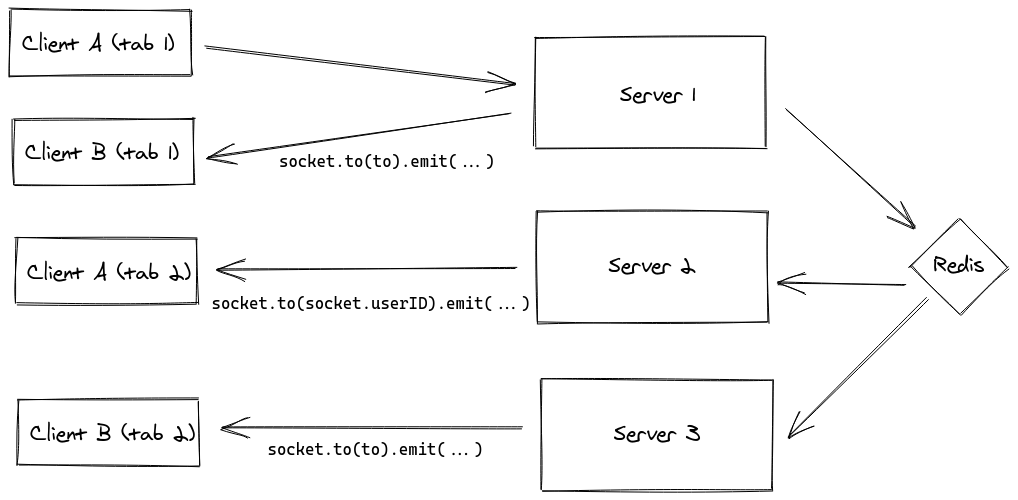
這是 Redis 介接器的職責,它依賴 Redis 發布/訂閱機制在 Socket.IO 伺服器之間廣播訊息,並最終傳送給所有客戶端。
const httpServer = require("http").createServer();
const Redis = require("ioredis");
const redisClient = new Redis();
const io = require("socket.io")(httpServer, {
  cors: {
    origin: "https://#:8080",
  },
  adapter: require("socket.io-redis")({
    pubClient: redisClient,
    subClient: redisClient.duplicate(),
  }),
});
大功告成!如果您電腦中有 Redis CLI,可以查看透過網路傳送的訊息
$ redis-cli
127.0.0.1:6379> PSUBSCRIBE socket.io*
Reading messages... (press Ctrl-C to quit)
1) "psubscribe"
2) "socket.io*"
3) (integer) 1
1) "pmessage"
2) "socket.io*"
3) "socket.io#/#"
4) "\x93\xa6XFD3OF\x83..."
文件
註:使用 Redis 介接器時,在「中斷連線」處理常式中使用的 allSockets() 方法會自動傳回所有 Socket.IO 伺服器的 Socket ID,因此無需更新。
檢閱
好的,讓我們總結一下:我們建立了一個功能齊全的聊天室(是的,再一次!)強健、準備好橫向擴充,讓我們得以導入一些有用的 Socket.IO 功能
感謝您的閱讀!