API 概觀
在我們繼續之前,讓我們快速瀏覽 Socket.IO 提供的 API
共用 API
下列方法可同時用於用戶端和伺服器。
基本發射
正如我們在步驟 4中所見,你可以使用 socket.emit() 將任何資料傳送至另一方
- 從用戶端至伺服器
- 從伺服器至用戶端
用戶端
socket.emit('hello', 'world');
伺服器
io.on('connection', (socket) => {
  socket.on('hello', (arg) => {
    console.log(arg); // 'world'
  });
});
伺服器
io.on('connection', (socket) => {
  socket.emit('hello', 'world');
});
用戶端
socket.on('hello', (arg) => {
  console.log(arg); // 'world'
});
你可以傳送任意數量的參數,並且支援所有可序列化資料結構,包括二進位物件,例如 ArrayBuffer、TypedArray 或 Buffer(僅限 Node.js)
- 從用戶端至伺服器
- 從伺服器至用戶端
用戶端
socket.emit('hello', 1, '2', { 3: '4', 5: Uint8Array.from([6]) });
伺服器
io.on('connection', (socket) => {
  socket.on('hello', (arg1, arg2, arg3) => {
    console.log(arg1); // 1
    console.log(arg2); // '2'
    console.log(arg3); // { 3: '4', 5: <Buffer 06> }
  });
});
伺服器
io.on('connection', (socket) => {
  socket.emit('hello', 1, '2', { 3: '4', 5: Buffer.from([6]) });
});
用戶端
socket.on('hello', (arg1, arg2, arg3) => {
  console.log(arg1); // 1
  console.log(arg2); // '2'
  console.log(arg3); // { 3: '4', 5: ArrayBuffer (1) [ 6 ] }
});
致謝
事件很棒,但在某些情況下,您可能想要更傳統的請求回應 API。在 Socket.IO 中,此功能稱為「致謝」。
它有兩種形式
使用回呼函式
您可以將回呼函式新增為 emit() 的最後一個參數,而當另一方確認事件後,將會呼叫此回呼函式
- 從用戶端至伺服器
- 從伺服器至用戶端
用戶端
socket.timeout(5000).emit('request', { foo: 'bar' }, 'baz', (err, response) => {
  if (err) {
    // the server did not acknowledge the event in the given delay
  } else {
    console.log(response.status); // 'ok'
  }
});
伺服器
io.on('connection', (socket) => {
  socket.on('request', (arg1, arg2, callback) => {
    console.log(arg1); // { foo: 'bar' }
    console.log(arg2); // 'baz'
    callback({
      status: 'ok'
    });
  });
});
伺服器
io.on('connection', (socket) => {
  socket.timeout(5000).emit('request', { foo: 'bar' }, 'baz', (err, response) => {
    if (err) {
      // the client did not acknowledge the event in the given delay
    } else {
      console.log(response.status); // 'ok'
    }
  });
});
用戶端
socket.on('request', (arg1, arg2, callback) => {
  console.log(arg1); // { foo: 'bar' }
  console.log(arg2); // 'baz'
  callback({
    status: 'ok'
  });
});
使用 Promise
emitWithAck() 方法提供相同的功能,但會傳回一個 Promise,當另一方確認事件後,此 Promise 將會解析
- 從用戶端至伺服器
- 從伺服器至用戶端
用戶端
try {
  const response = await socket.timeout(5000).emitWithAck('request', { foo: 'bar' }, 'baz');
  console.log(response.status); // 'ok'
} catch (e) {
  // the server did not acknowledge the event in the given delay
}
伺服器
io.on('connection', (socket) => {
  socket.on('request', (arg1, arg2, callback) => {
    console.log(arg1); // { foo: 'bar' }
    console.log(arg2); // 'baz'
    callback({
      status: 'ok'
    });
  });
});
伺服器
io.on('connection', async (socket) => {
  try {
    const response = await socket.timeout(5000).emitWithAck('request', { foo: 'bar' }, 'baz');
    console.log(response.status); // 'ok'
  } catch (e) {
    // the client did not acknowledge the event in the given delay
  }
});
用戶端
socket.on('request', (arg1, arg2, callback) => {
  console.log(arg1); // { foo: 'bar' }
  console.log(arg2); // 'baz'
  callback({
    status: 'ok'
  });
});
注意
不支援 Promise 的環境(例如 Internet Explorer)需要新增 polyfill 或使用編譯器,例如 babel,才能使用此功能(但這不在本教學的範圍內)。
萬用監聽器
萬用監聽器是一個會針對任何傳入事件呼叫的監聽器。這對於偵錯您的應用程式很有用
傳送者
socket.emit('hello', 1, '2', { 3: '4', 5: Uint8Array.from([6]) });
接收者
socket.onAny((eventName, ...args) => {
  console.log(eventName); // 'hello'
  console.log(args); // [ 1, '2', { 3: '4', 5: ArrayBuffer (1) [ 6 ] } ]
});
類似地,對於傳出封包
socket.onAnyOutgoing((eventName, ...args) => {
  console.log(eventName); // 'hello'
  console.log(args); // [ 1, '2', { 3: '4', 5: ArrayBuffer (1) [ 6 ] } ]
});
伺服器 API
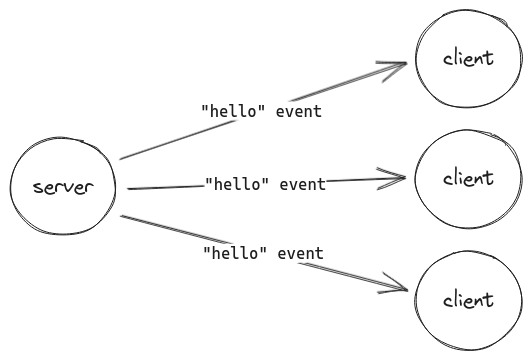
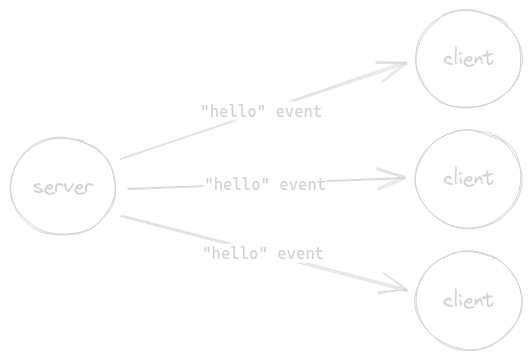
廣播
正如我們在 步驟 5 中所看到的,您可以使用 io.emit() 將事件廣播給所有已連線的用戶端。
io.emit('hello', 'world');
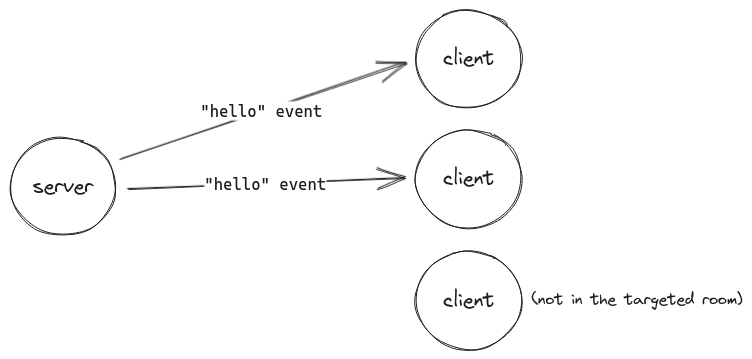
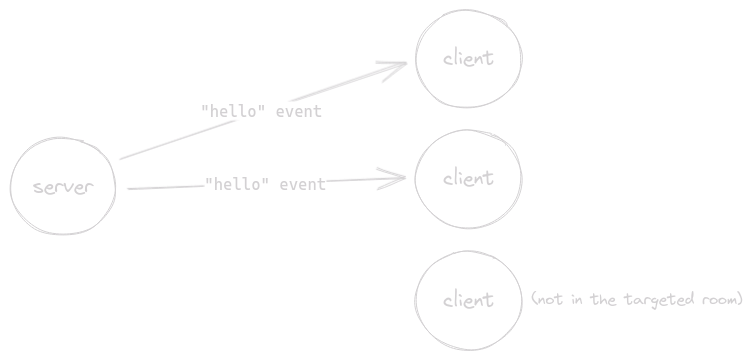
房間
在 Socket.IO 術語中,房間是一個任意的頻道,其中插槽可以加入和離開。它可用於向連線客戶端子集廣播事件
io.on('connection', (socket) => {
  // join the room named 'some room'
  socket.join('some room');

  // broadcast to all connected clients in the room
  io.to('some room').emit('hello', 'world');

  // broadcast to all connected clients except those in the room
  io.except('some room').emit('hello', 'world');

  // leave the room
  socket.leave('some room');
});